Thrifty Kitchen Renovation – A Refreshed Traditional Kitchen for Less
I’m sharing our Thrifty Kitchen Renovation because with skyrocketing labor and material prices, figuring out how to save money in home improvements is essential to your success. We were able to save half the price of what we were originally quoted with some extra sweat and creativity, proving that money isn’t the only way to curate a beautiful space to nourish your family in.
This post may contain affiliate links, I may make a small commission off these items if purchased. This does not influence my recommendations or price of the item if purchased.
Old Home, Old Kitchen
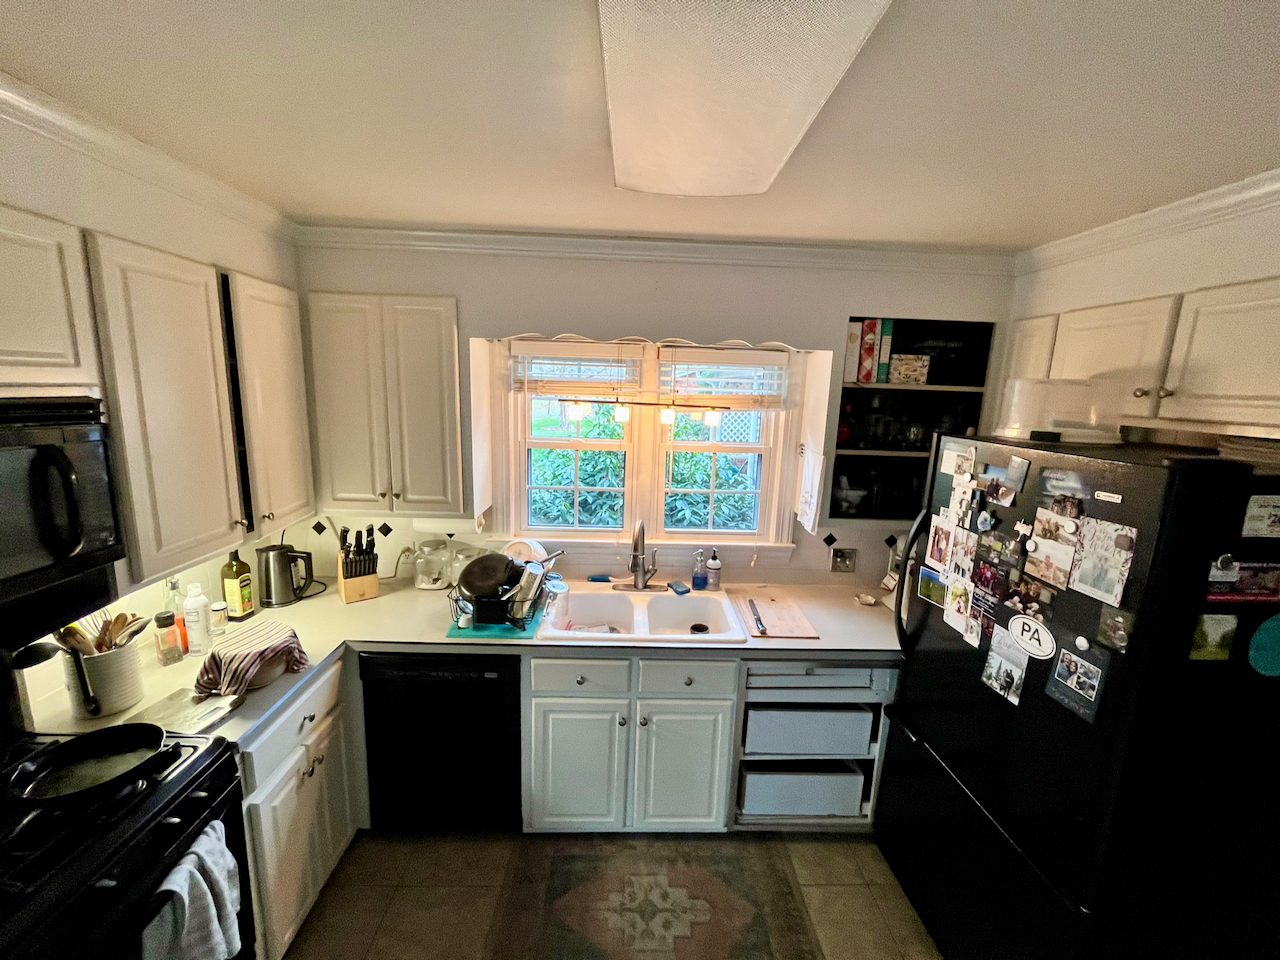
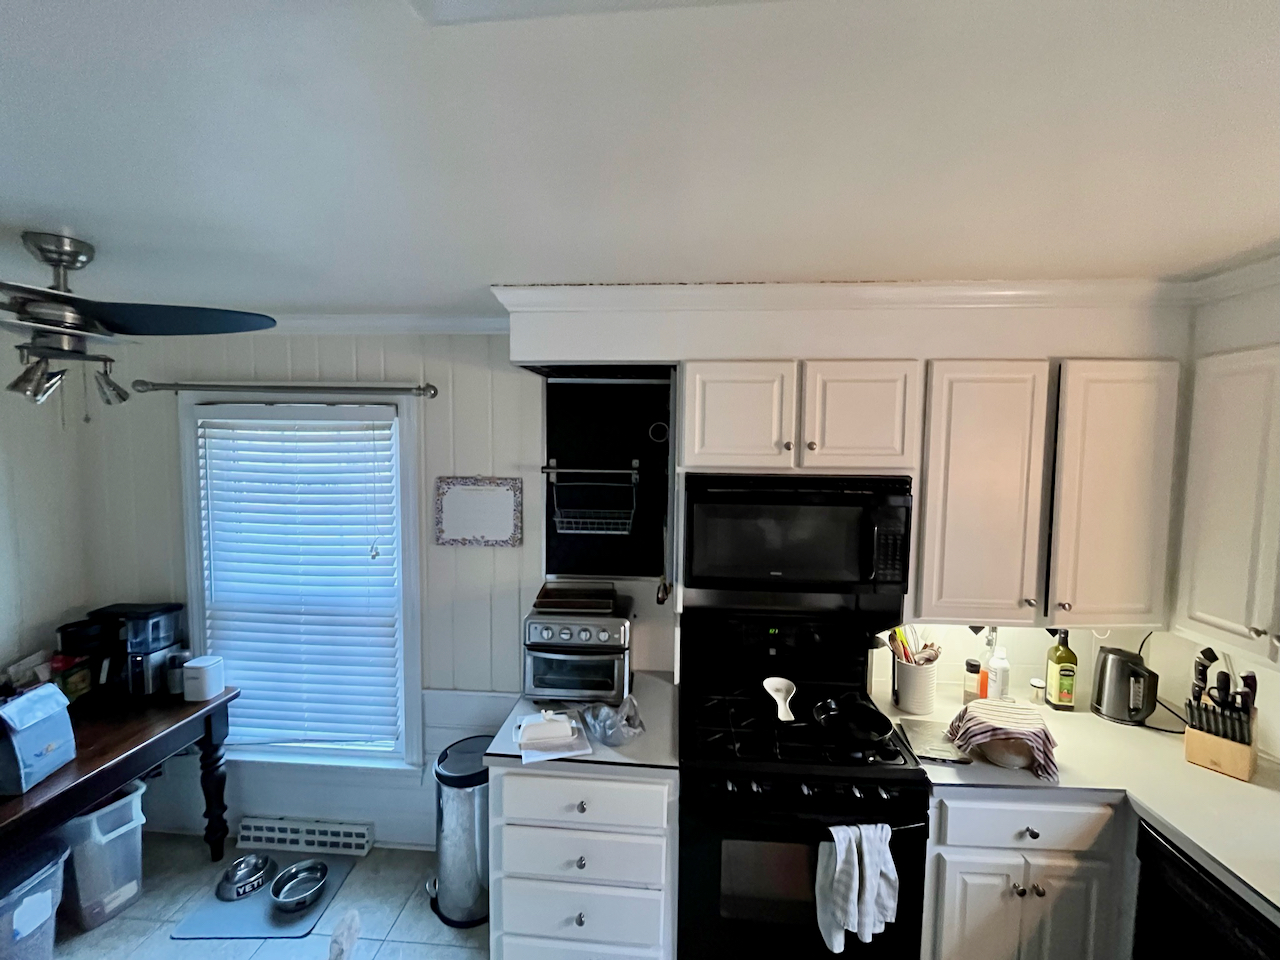
My husband and I moved into our house as blissful newlyweds in the hectic housing boom of 2021. We found a 1960s brick colonial ranch that was a little bit of a fixer upper, but in a great location with great bones and character. It had a wood paneling kitchen that appeared to have been updated once or twice. The kitchen had mismatched built-in cabinets that were falling apart, tongue-n-groove that was painted over, major layout issues, a broken fluorescent overhead light and many more cringe-y design choices. Oh and to make things more complicated, the laundry room is a closet within the kitchen. We decided to take on the house and all it’s projects and after living in our home for 2 years we identified what we had to fix, what style and design we preferred and how much we could afford.
Our Goals for a Thrifty Kitchen Renovation
- Make our kitchen functional again
- Timeless aesthetics that are durable
- Keep price to about 10% of home price (without financing)
First, Research and Inspiration
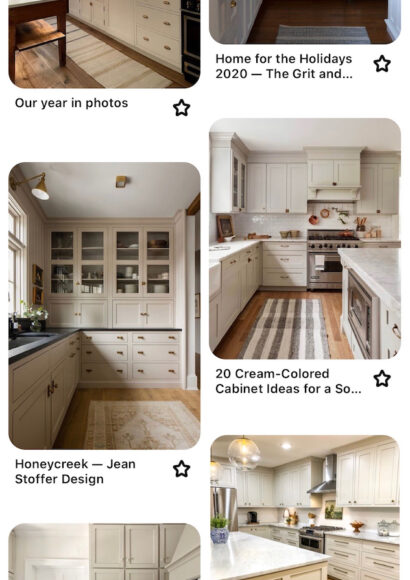
My design and remodel qualifications for our thrifty kitchen renovation came from many episodes of Fixer Upper and Dream Home makeover. I knew with the right pinterest board (see screenshot of my inspo board) I could make this dream kitchen happen. When we were ready to pull the trigger we got a quote from a highly recommended “all-inclusive” general contractor. When we got that quote back, we were crushed, as the quote was WAY outside that “10% of the home price” budget and we felt like it wasn’t going to be possible at all. Thankfully we talked to other people we knew who had done kitchen renos and they encouraged us to look into other options.
Thrifty Labor
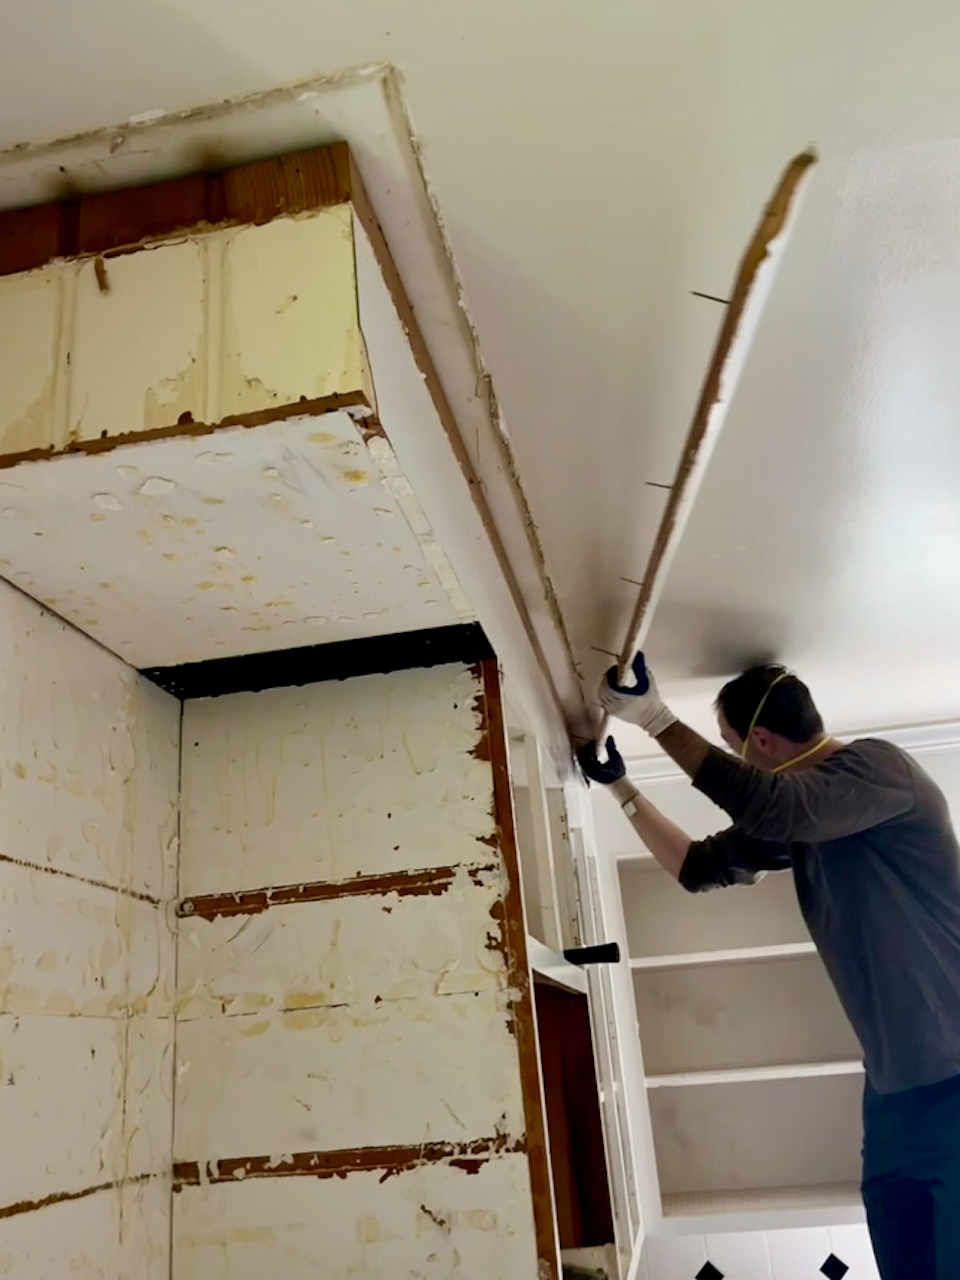
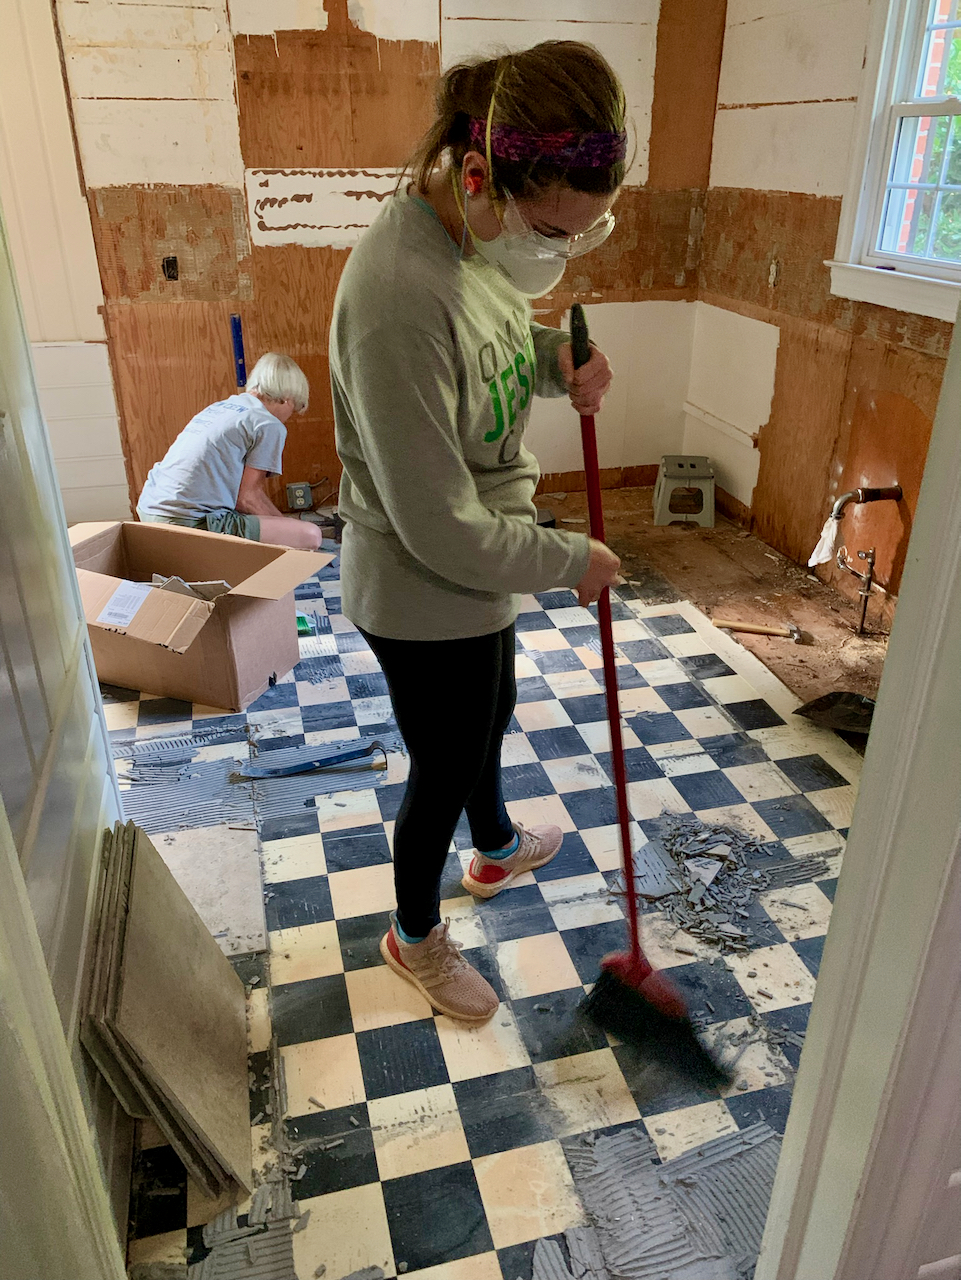
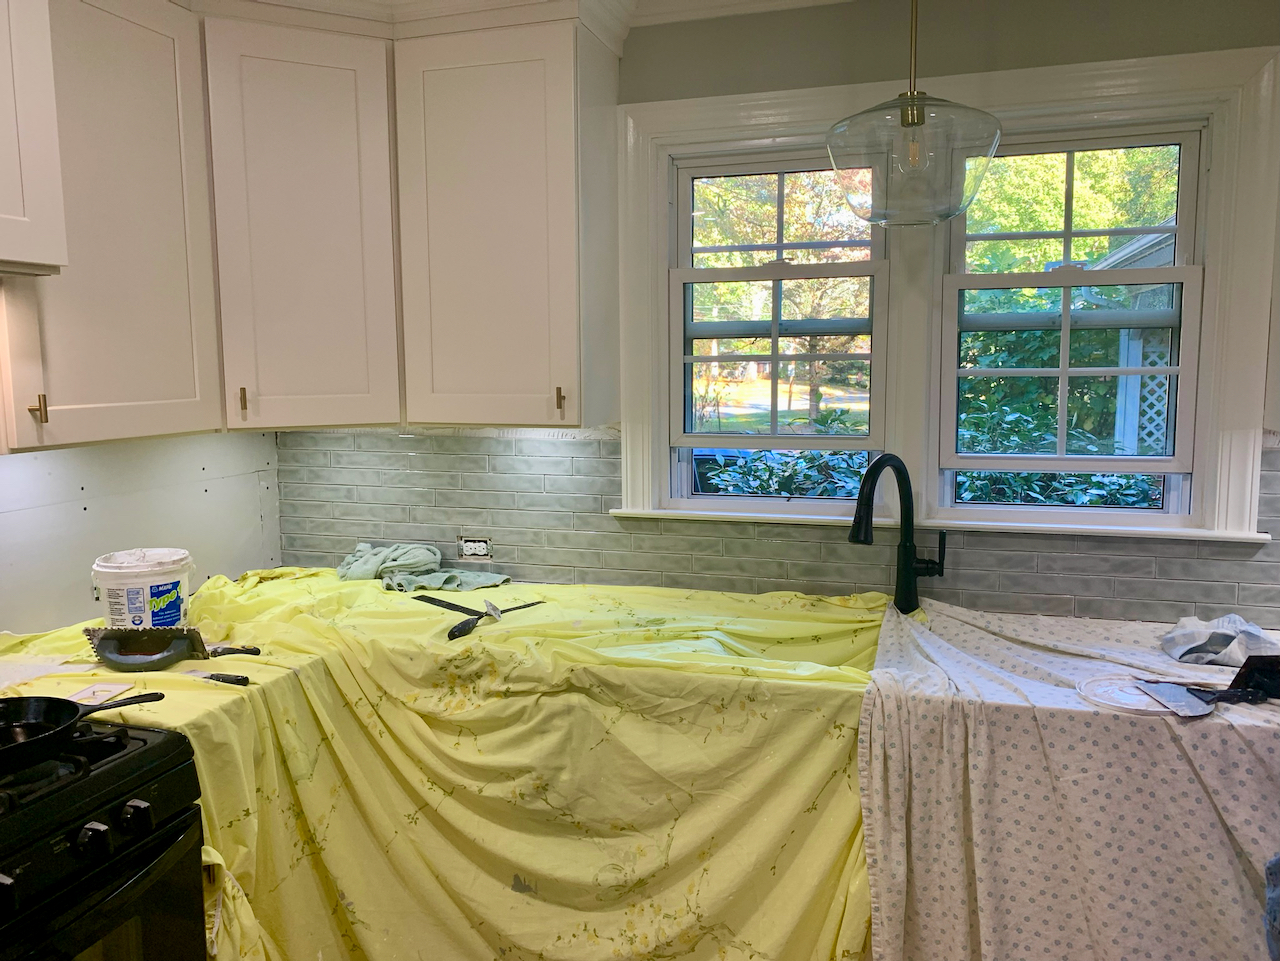
As we went back to the drawing board, we faced our limits. We had done some very small home improvements which involved laying LVP flooring and painting but nothing skilled enough to qualify for a total DIY kitchen reno. We eventually found a contractor that was willing to work with us with our new strategy. In order to save more than half the cost of labor we decided we would gut the entire kitchen and laundry closet ourselves. Afterall our thrifty kitchen renovation was still possible! After that the contractor team would do plumbing, electrical, put up studs and drywall as needed. They would install our cabinets and trim/crown but we would finish up the project. We would install LVP flooring, backsplash, and paint ourselves.
Optimizing Layout
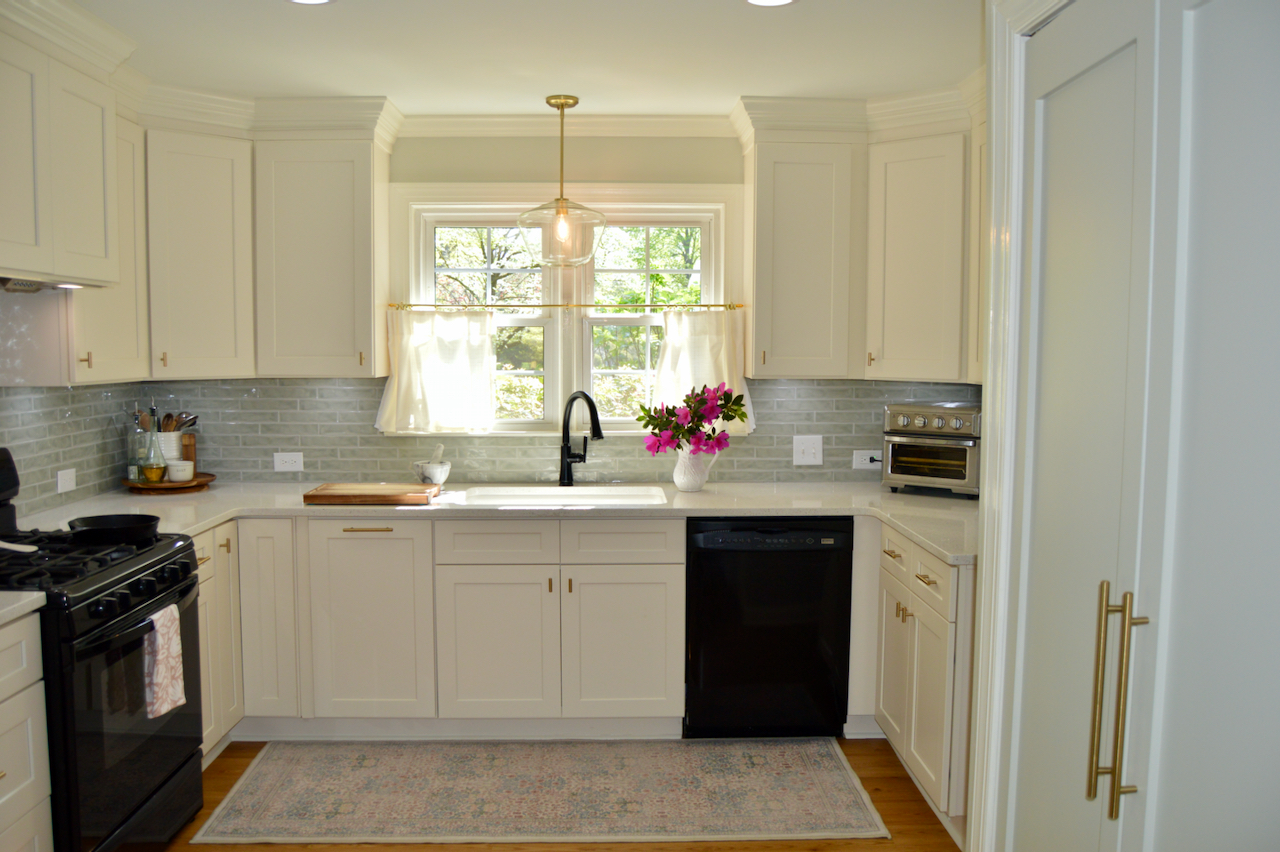
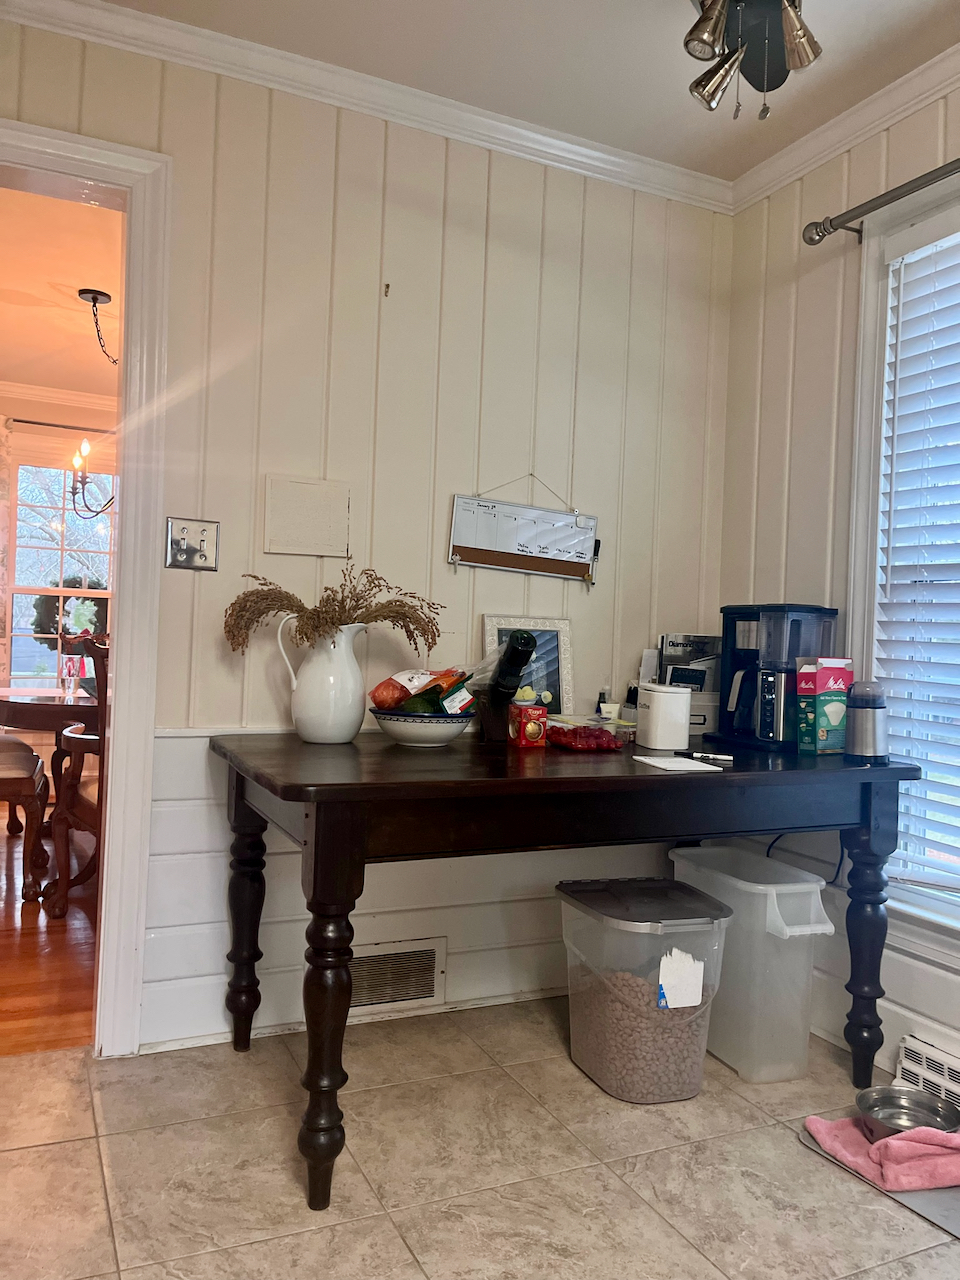
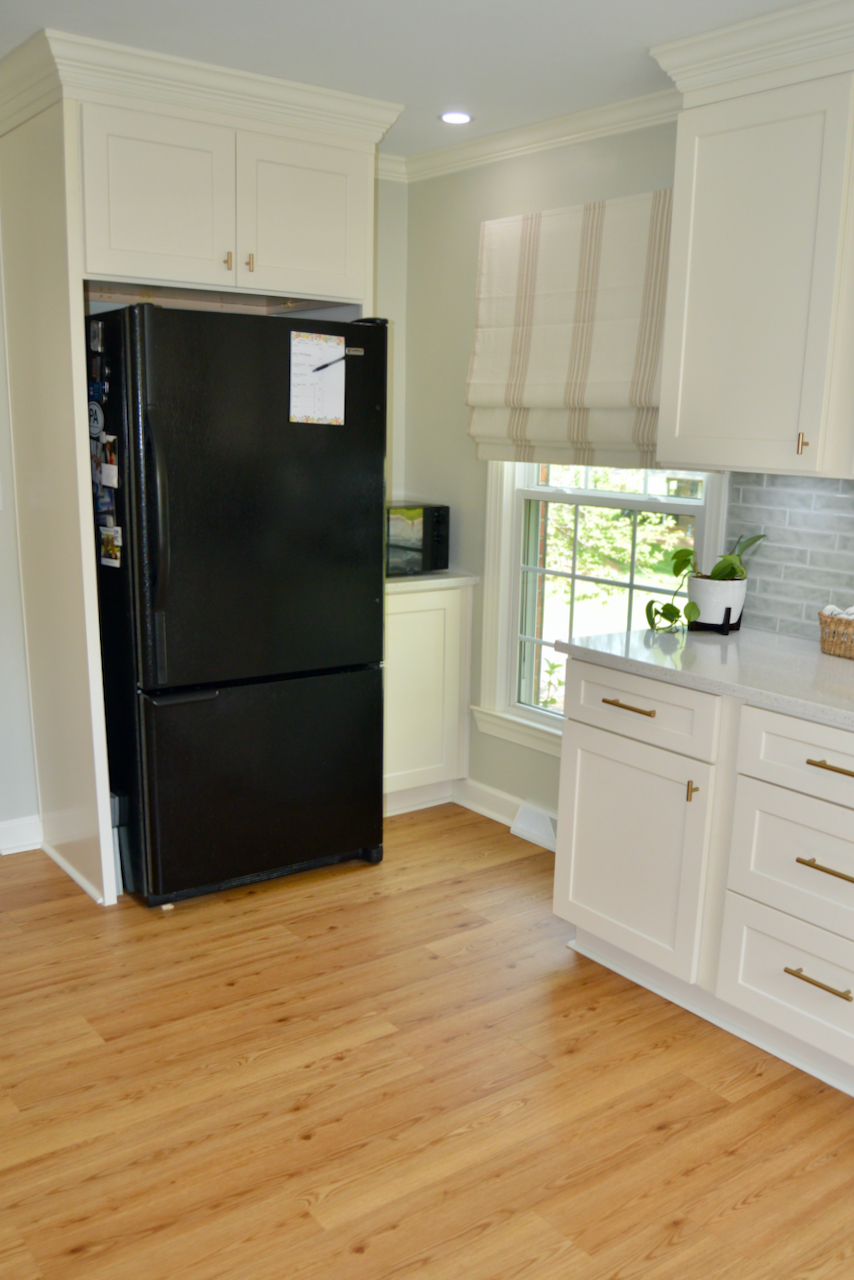
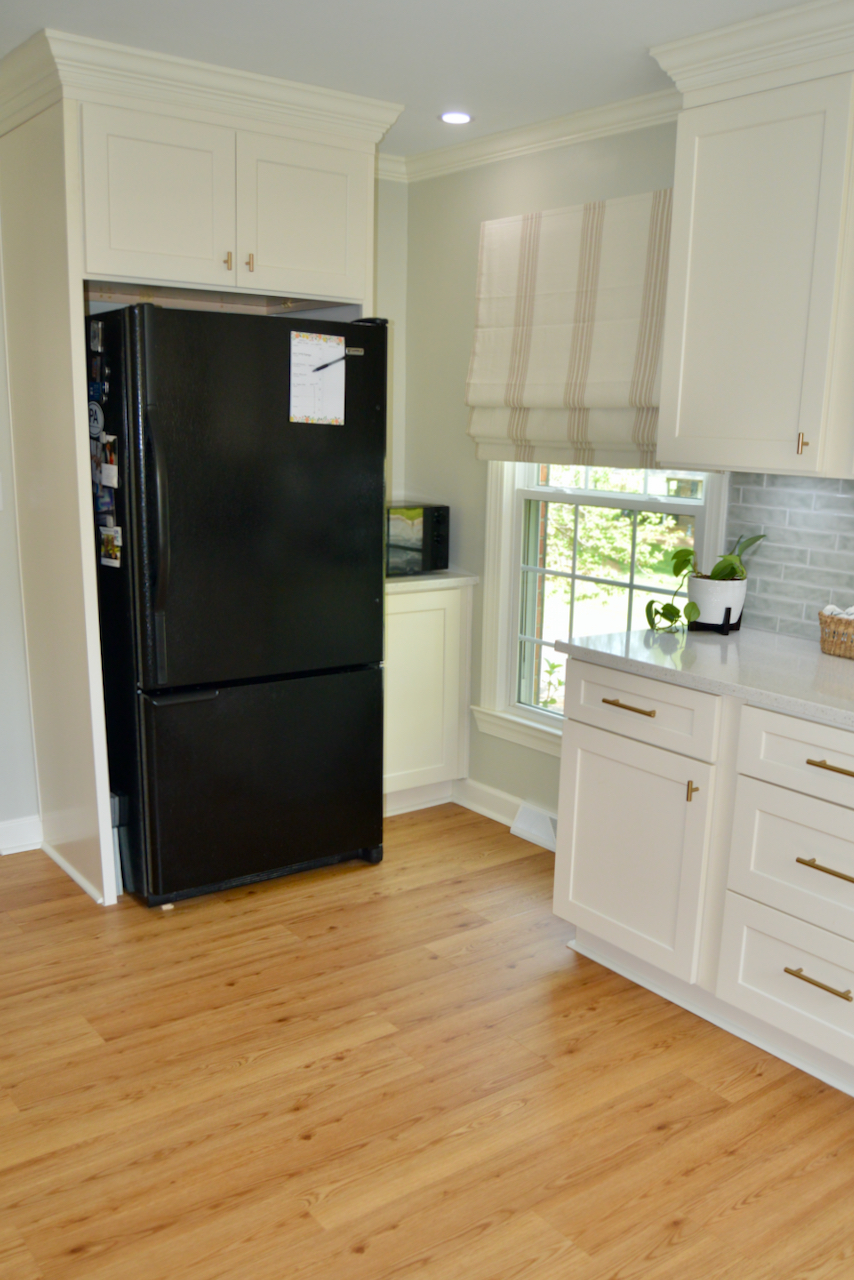
Since our top goal was to make our kitchen functional again we had to optimize the space with the layout. Prior to the reno there was a corner of the kitchen that held a table which just became a place to hold clutter. We wanted to use this space for to free up the counter space in the main part of the kitchen. The kitchen was currently L-shaped but could be a U- shaped kitchen. The fridge was positioned within the work spaces, creating a lot of dead space and limited tasking/counter space. It was very difficult for more than 1 person to work in the kitchen at a time. We designed a layout that removed dead space, had functional cabinets with practical storage. We got the fridge out of the work zone and created multiple tasking zones within the kitchen.

Optimizing Laundry and Pantry Space
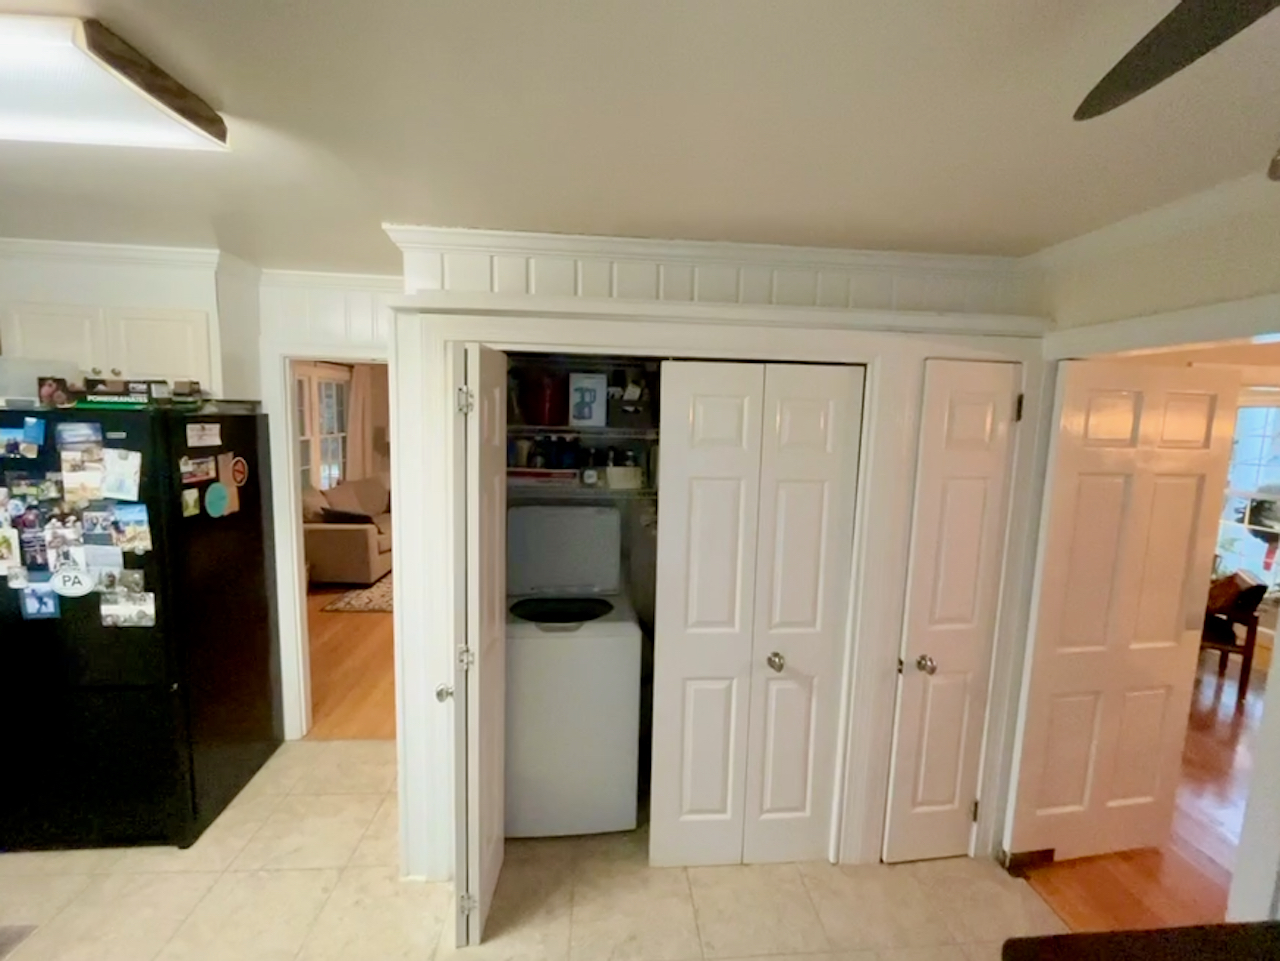
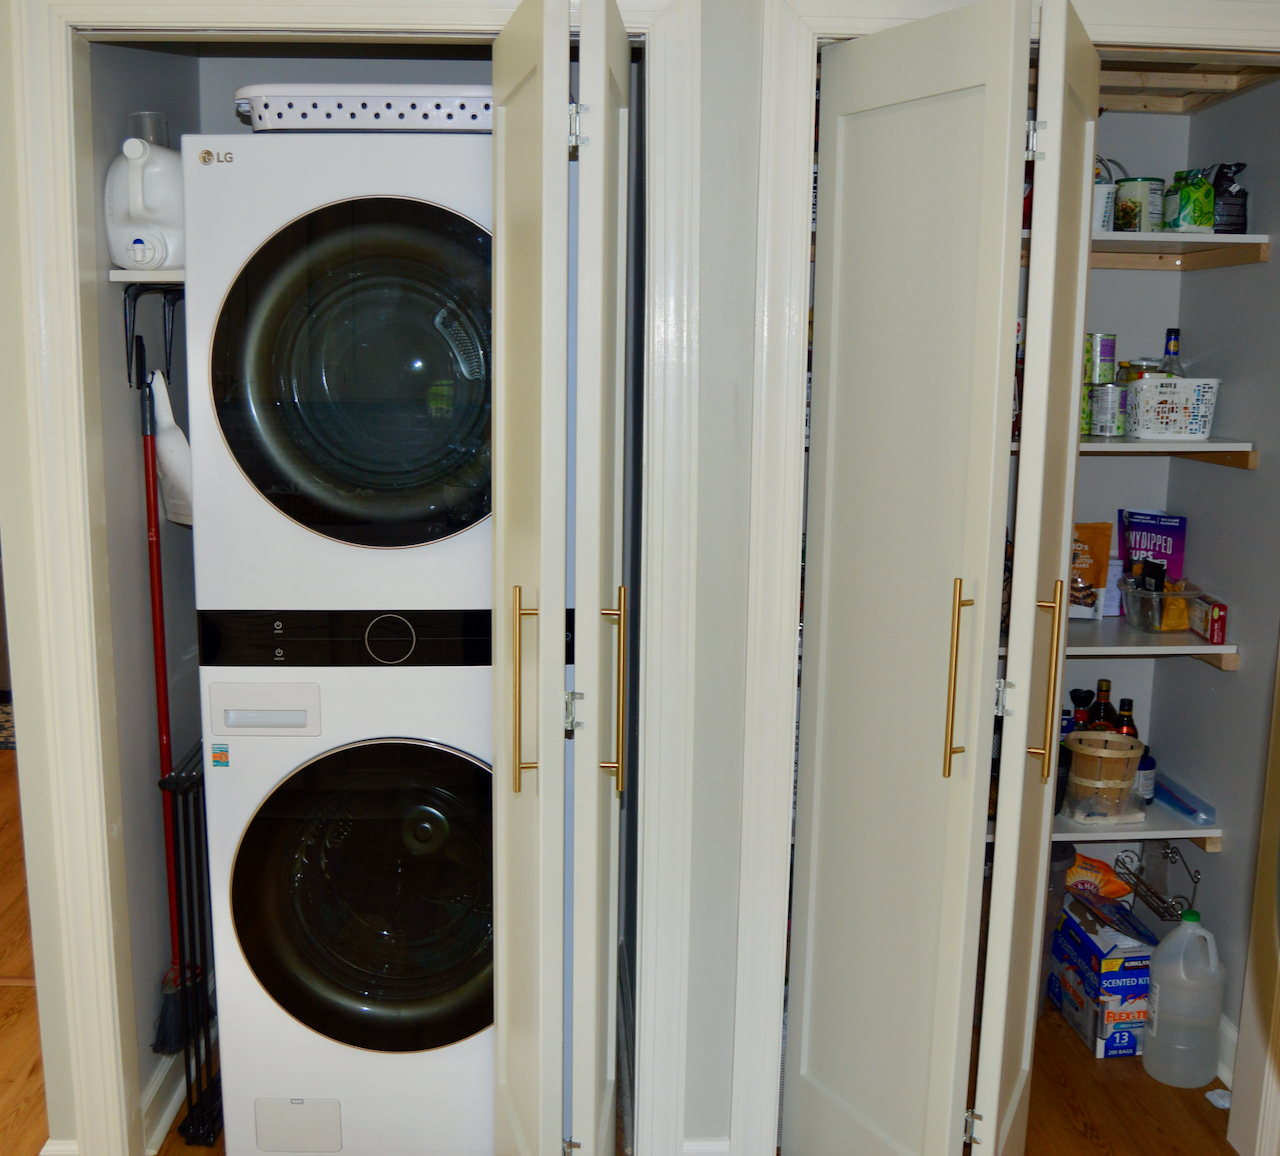
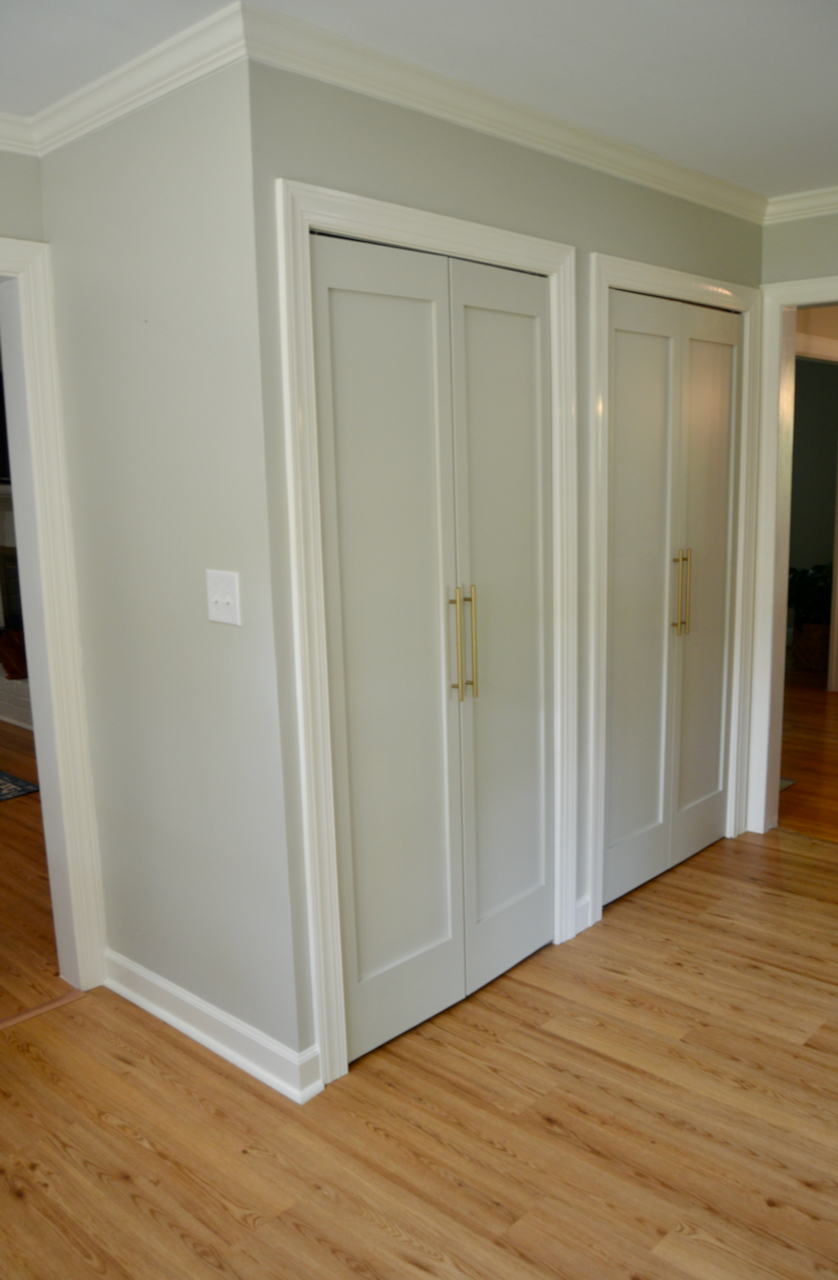
We also had to optimize our laundry area. Previously the laundry closet had a side-by-side washer and dryer with shelving above it. The shelving was hard to access and cosmetically it was a mess. There was this narrow pantry along the same wall. You couldn’t see anything in there and I would “lose” food we stored in there because we couldn’t find it. We decided we needed to gut that whole area and create two equal closets. One closet would house a stackable washer and dryer and the other would be a spacious pantry.
Curating our Thrifty Kitchen Renovation
1. Cabinets
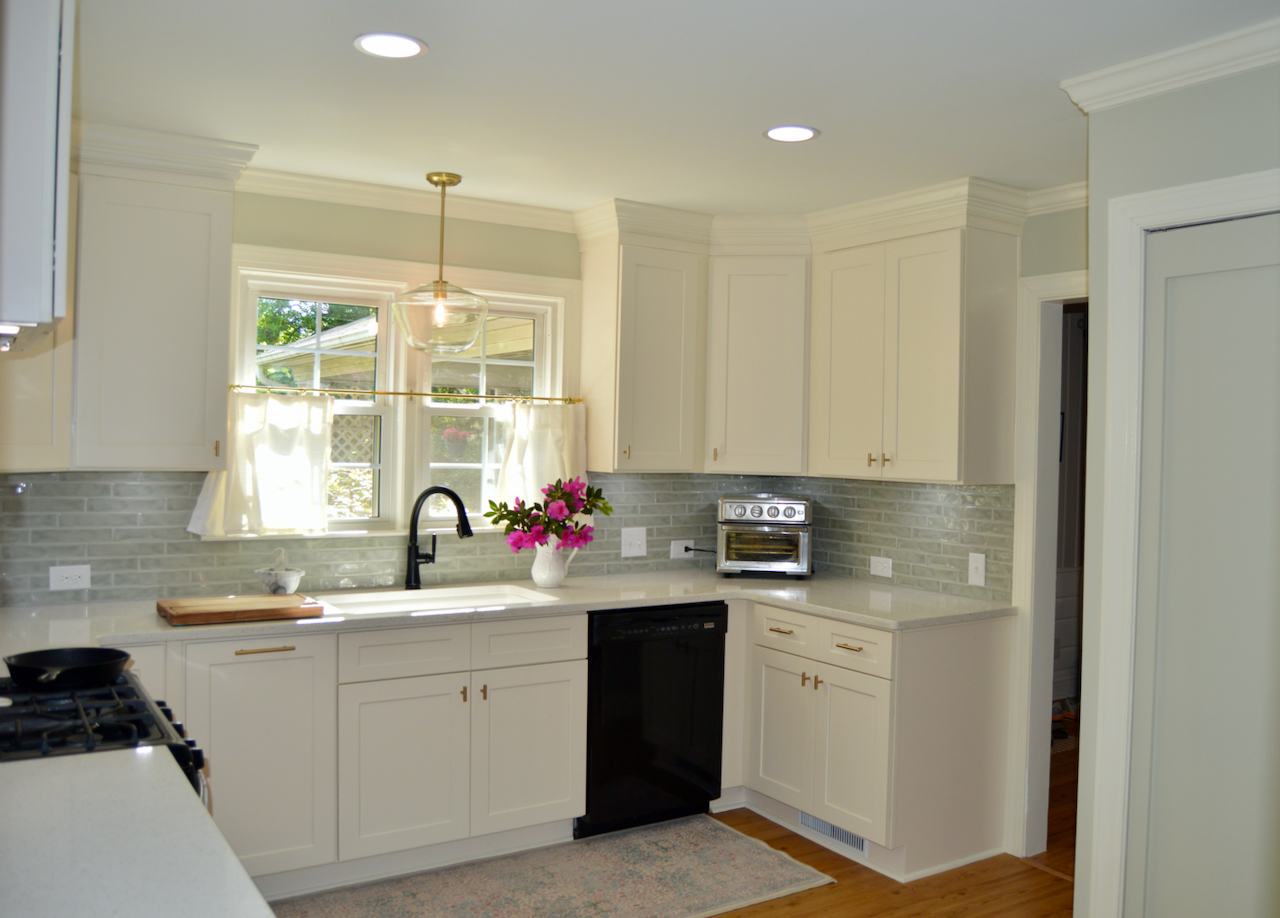
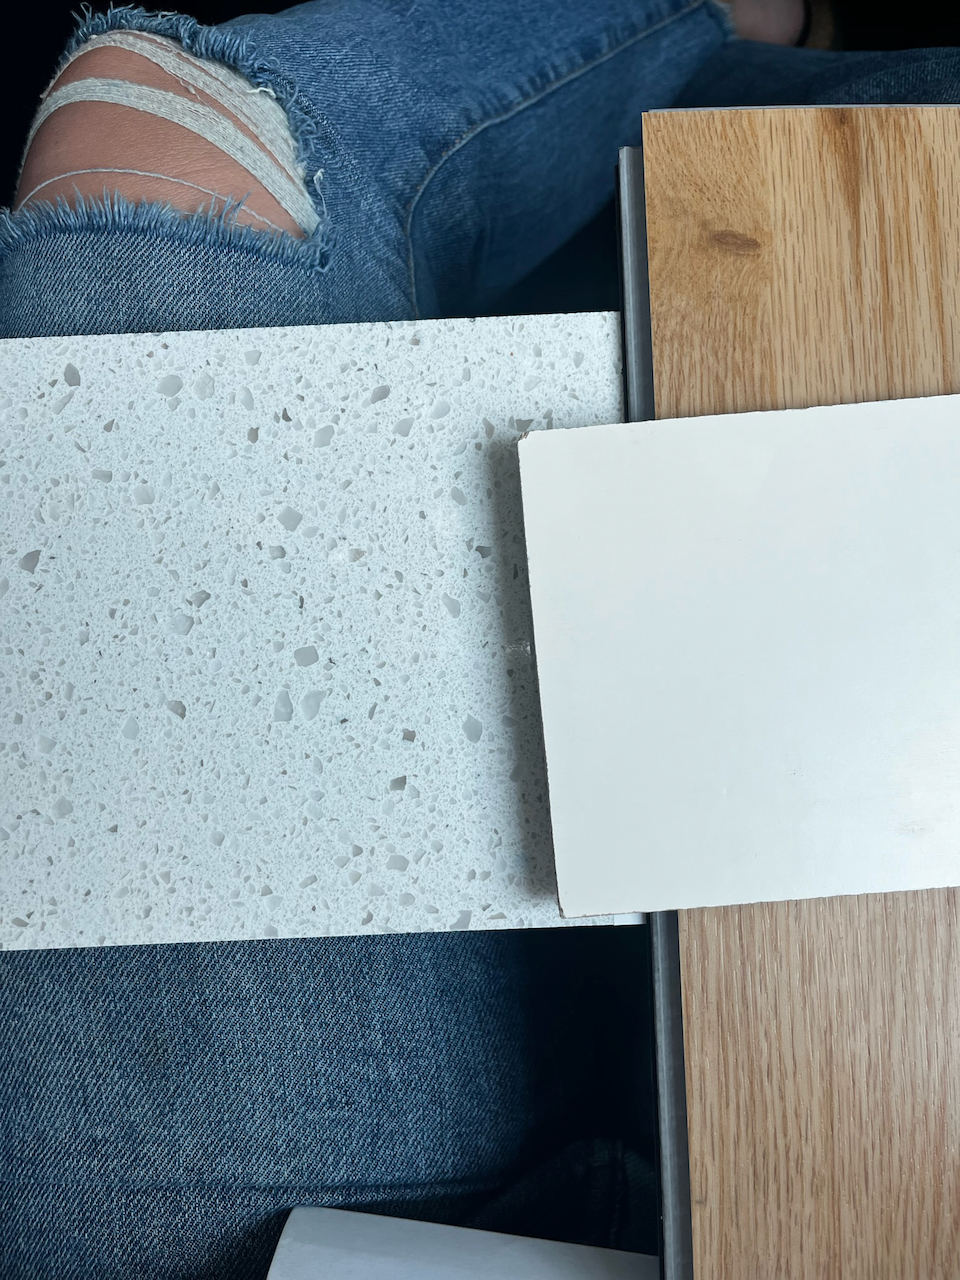
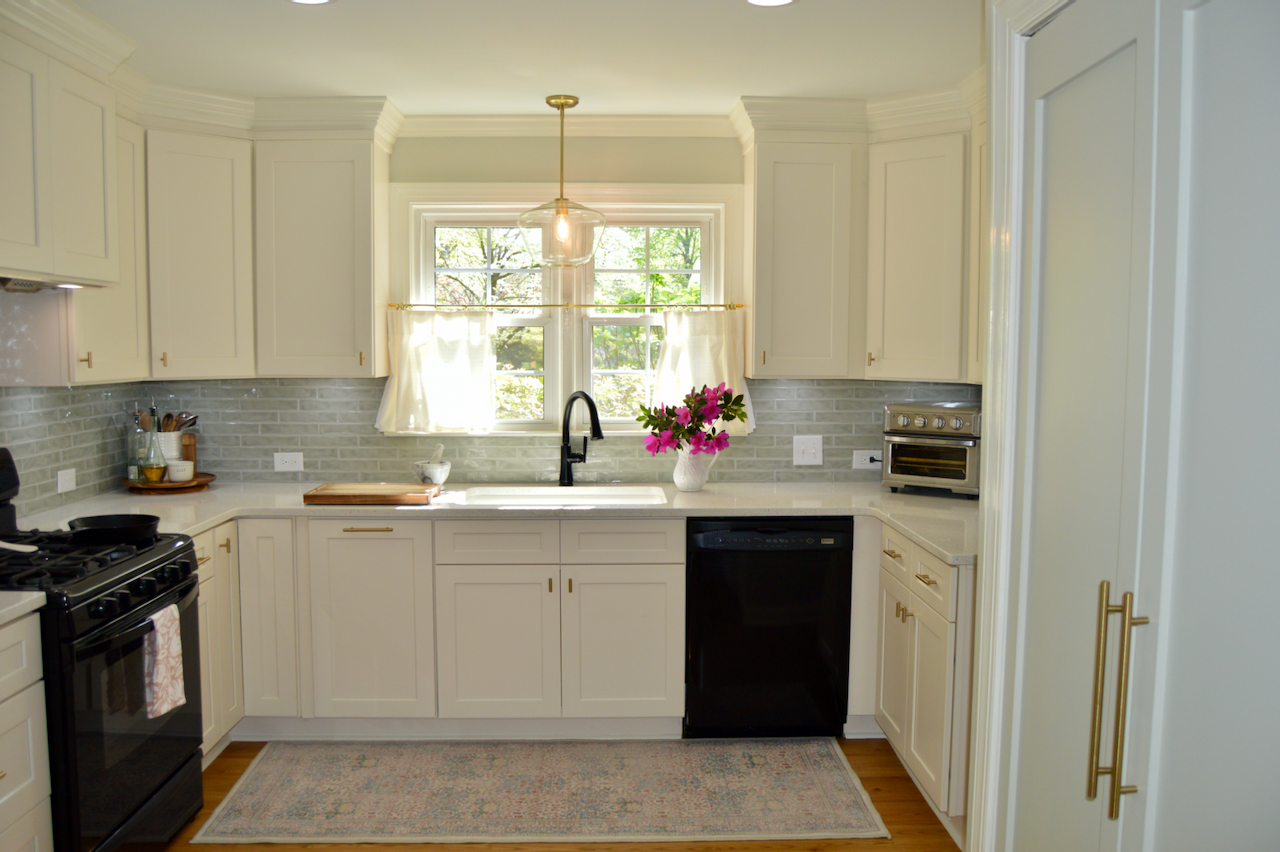
Cabinets are definitely an investment and can get expensive quick. We started with a couple budget cabinet designers and worked on renderings to get cabinet quotes. We knew cabinets were going to be the largest cost item and so it was best to get that figured out first. By saving money on the cost of labor we were able to afford more quality cabinetry options. We found a local cabinet supplier that had could produce renderings, complete assembly and could customize cabinets as needed with cabinet lines at multiple price points. They came to our home and measured everything. We settled on the a Shaker cabinet in “Antique White”. I felt that the cream color was the way to achieve a traditional warmth to match the style of the rest of our home at an affordable price point. Now we have plenty of usable storage!
2. Countertops
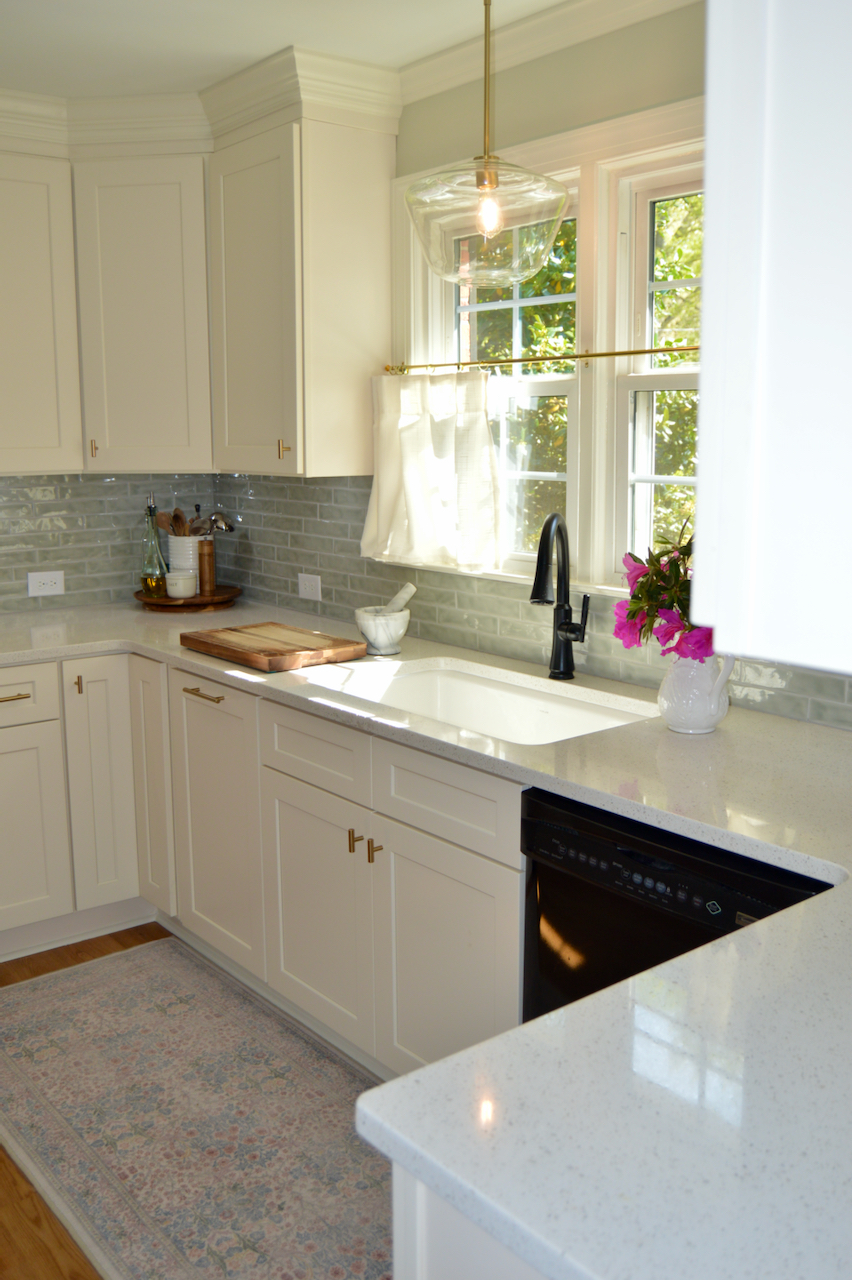
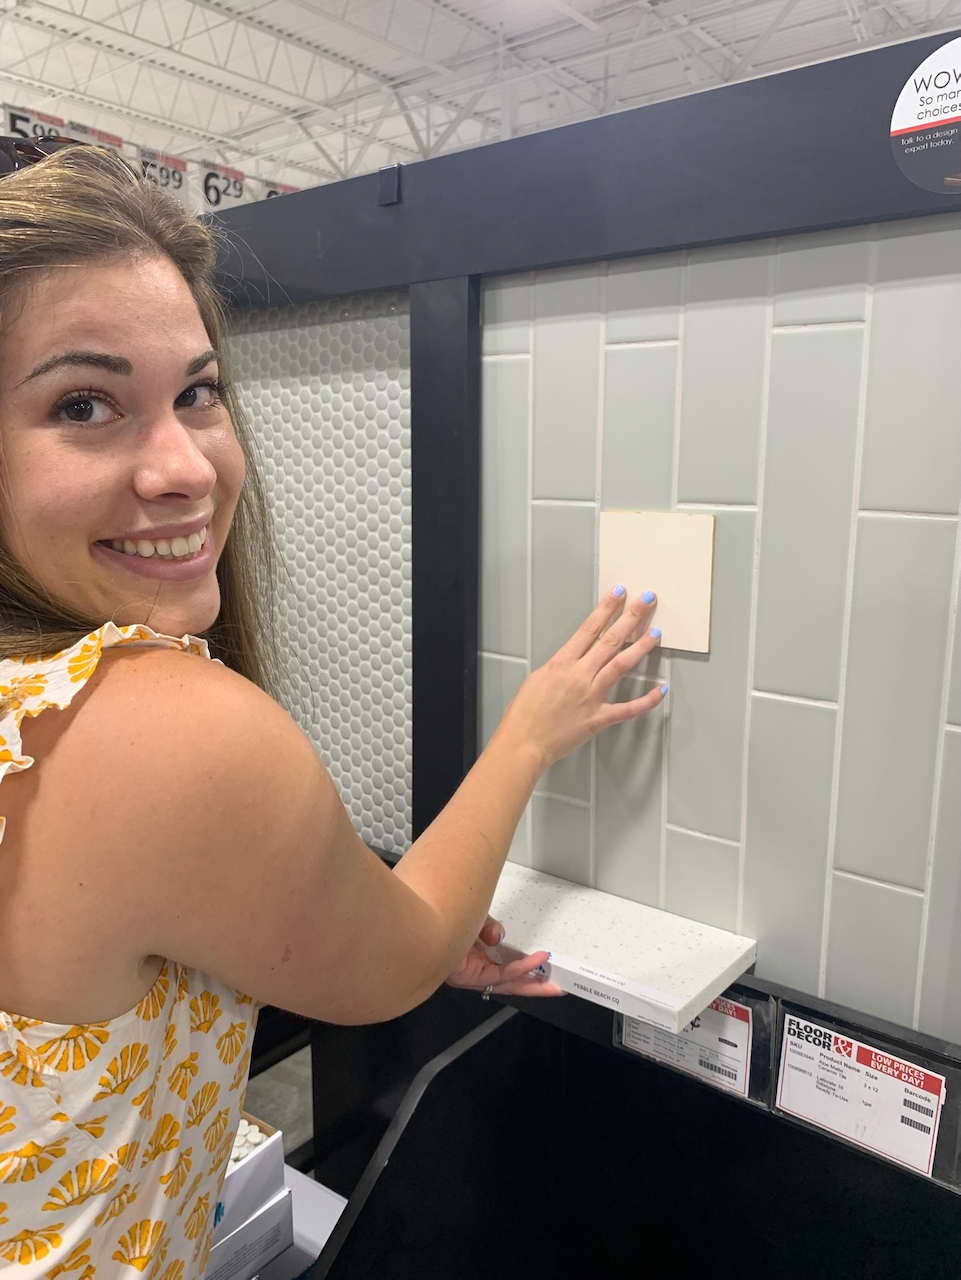
Another big upgrade to the kitchen was going to be the countertops. Previously we had laminate countertops and we wanted to do some sort of stone counter. We compared many different granite and quartz options and eventually settled on a Pebble Beach Quartz. It mimicked the natural look of granite, without being busy, to achieve our refreshed traditional/transitional aesthetic.
3. Flooring
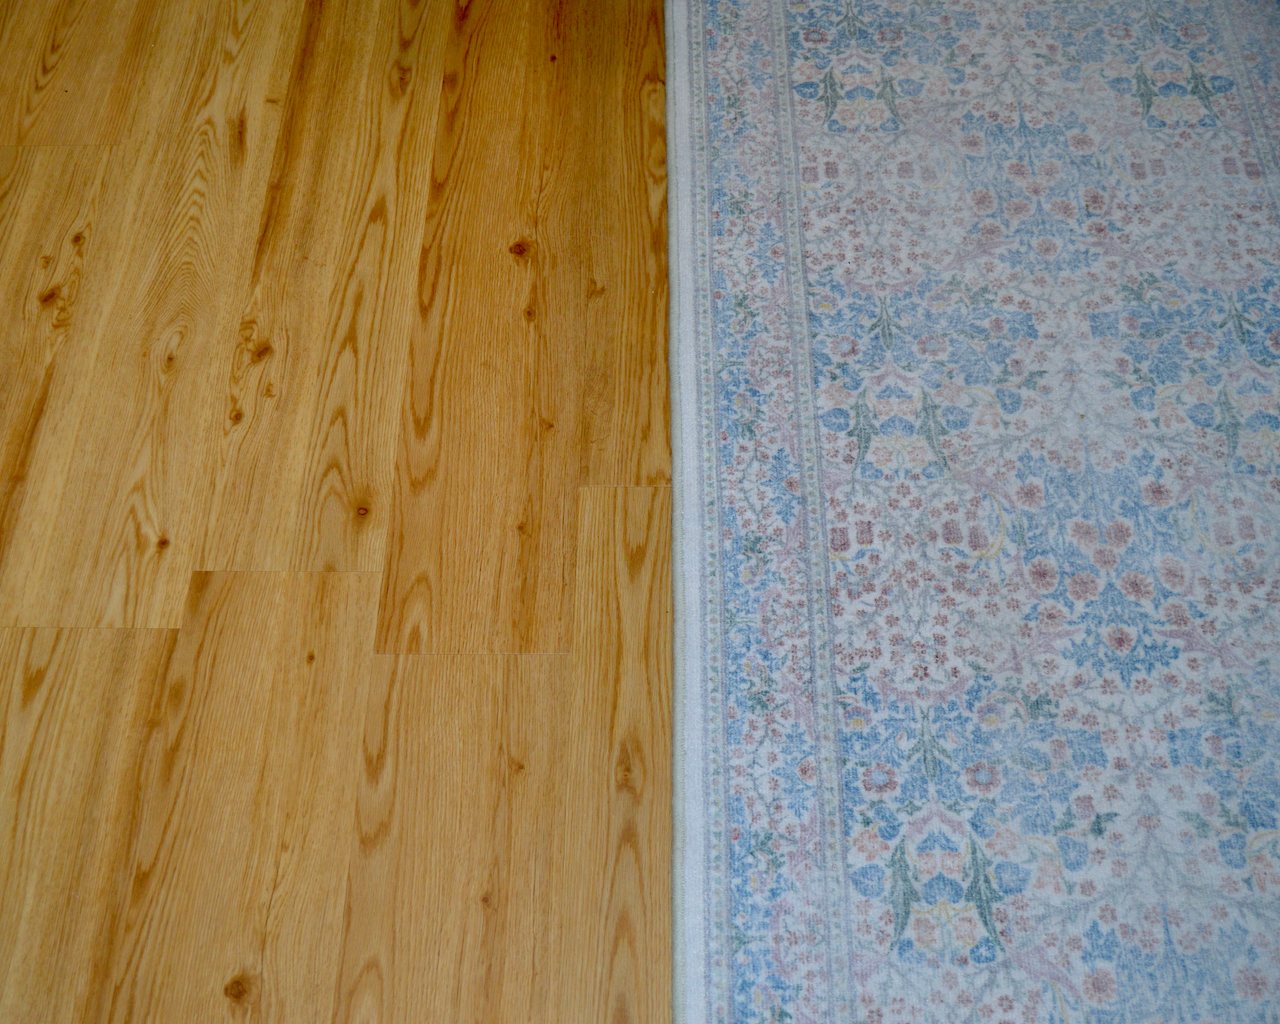
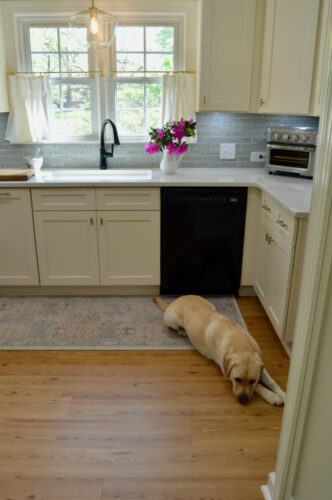
Most of our home has red oak hardwood flooring and have grown to love them. I spent many of the first few months in our home trying to figure out what paint colors would compliment the floors. We decided to use a luxury vinyl plank flooring that would almost match the original hardwoods to make a cohesive look throughout the home. We had installed it in the adjacent living room and loved how durable it is. It is waterproof which was an important thing to consider for kitchen flooring.
4. Appliances
The appliances was another area that we saved big money. We had a working set of appliances from when we moved into the home, they aren’t especially pretty but they still work! We decided to not replace our appliances as part of the kitchen remodel. Most people do replace appliances but we decided that replacing them did not directly help us reach our goals. We have had the remodel done for 6 months now and we still don’t mind our current appliances. We plan to replace them if they break or become an eyesore, but so far we are happy with how things currently are.
5. Our Thrifty Vent Hood
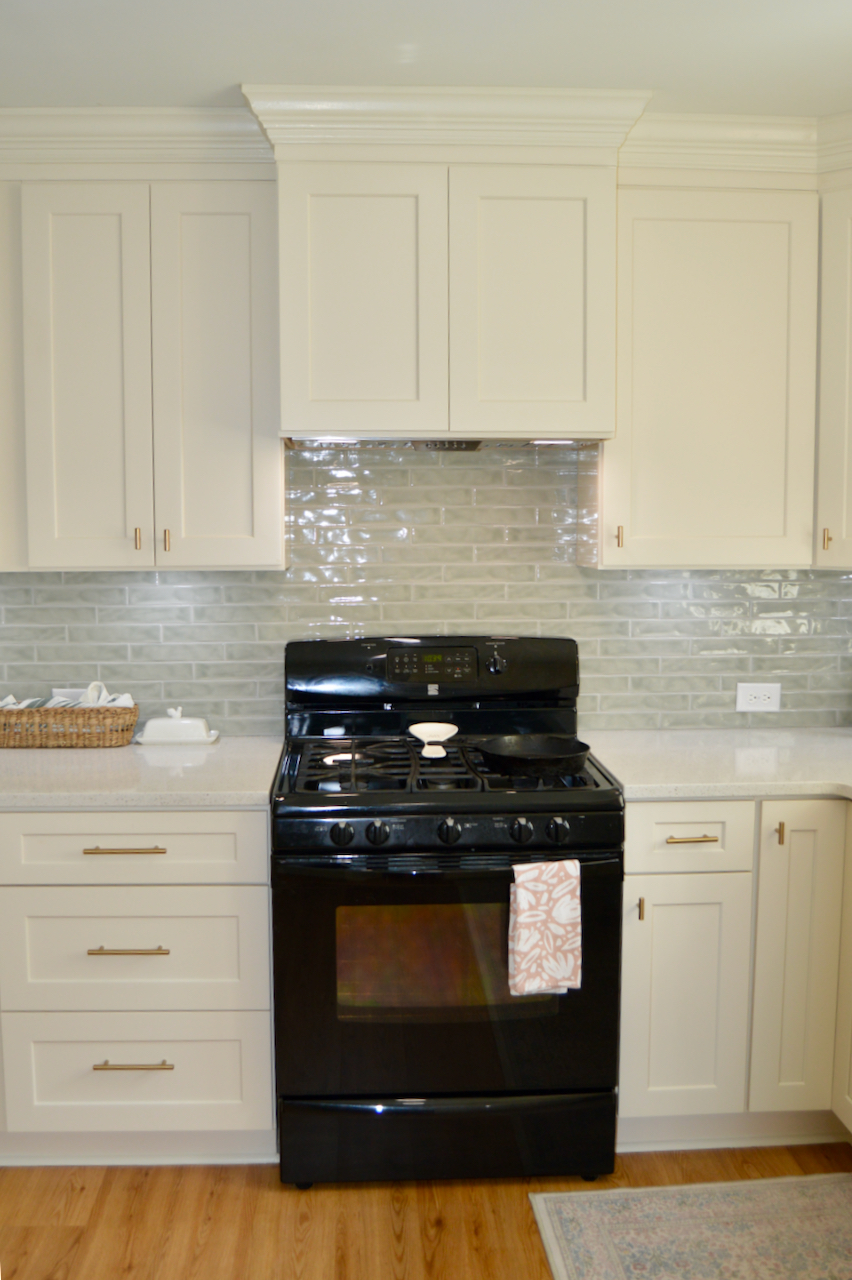
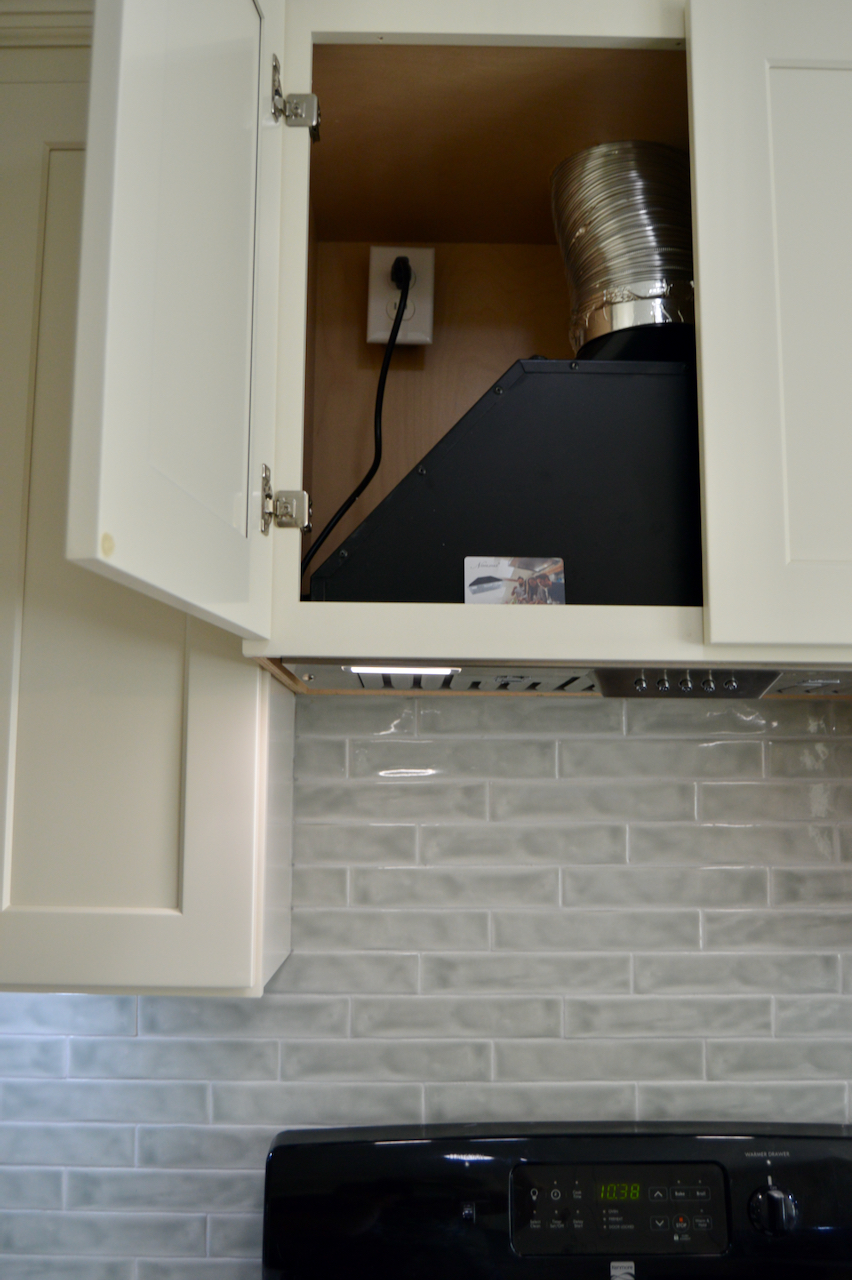
I don’t love having a microwave installed above the stove; while it is space-saving the vent fans rarely work that well and it’s not aesthetically pleasing. We moved our microwave to a little nook by our fridge. We had to get creative on how we were going to be achieve an aesthetic vent hood without a big purchase. I talked with our cabinet rep and they had a showroom model with a cabinet used as a vent hood. We got a deeper cabinet to put in that space, then they cut out the bottom to fit the vent hood insert and fortunately we already had an exhaust hole to connect with the vent hood duct. This allowed a seamless look across our upper cabinets and keeps the actual vent discrete. We love it so far!
6. Backsplash
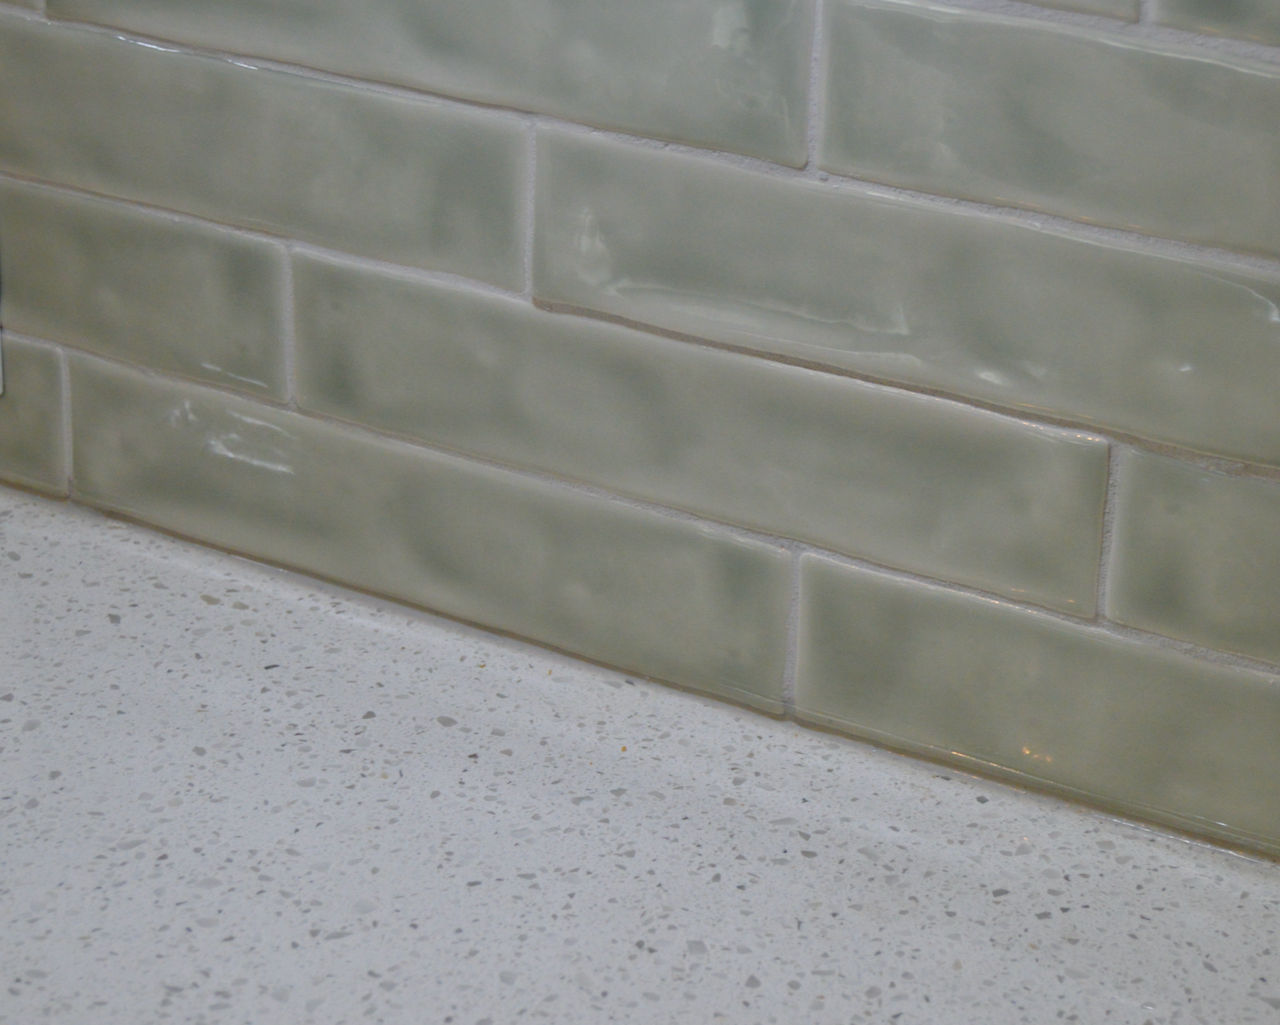
Picking backsplash was the most fun part of our thrifty kitchen renovation. We decided on TileBar, Seaport Chameleon Sage Gray. Their samples arrive packaged so well that I knew I could trust them for a full shipment of tile. They also recommended and sold a coordinating grout which made it so easy. The tile we picked is kind of like a zellige/subway tile combination but was much more user-friendly for install than zellige. We did not use spacers keep the grout lines minimal and create this sleek backsplash. Our contractor even encouraged us to do the backsplash ourselves and said, “If you can butter bread, you can put up backsplash.” It wasn’t quite that easy but it was a fun project.
Side note: we used Sherwin Williams’ Sedate Gray for wall paint color – a greige with green undertones that we’ve used in several rooms already. It balances out the orange of our flooring and shows up as a calming light green our walls.
7. Hardware, Lighting, and Accessories
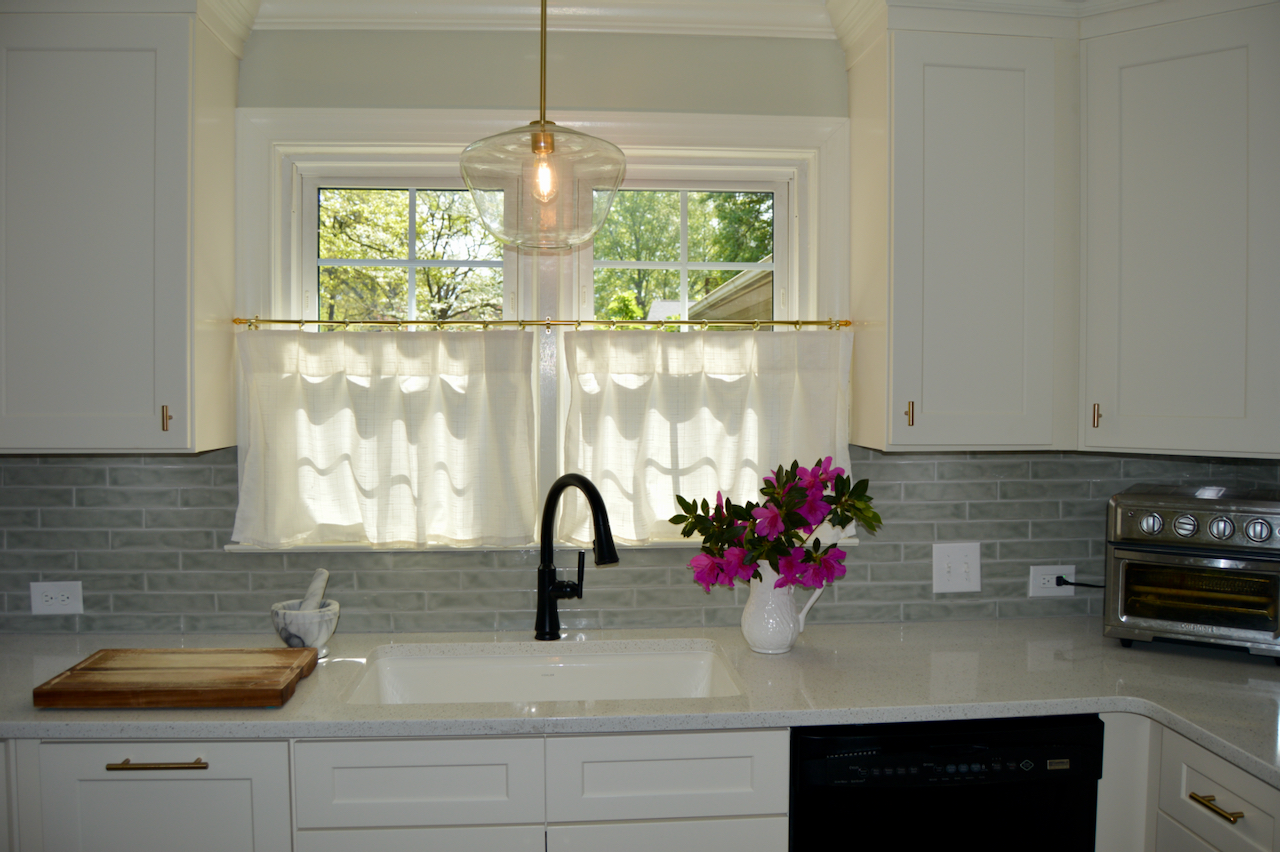
This part was like icing on the cake for our thrifty kitchen renovation! We installed overhead LED dimmable lights in our kitchen and under-cabinet lighting so we only need one pendant over the sink. This pendant has nice soft curves and matched our bronze hardware. We picked this honey bronze hardware which brought out the warmth of our cabinet color and floors. However we used a black sink faucet to pull in the black from our appliances, when we do replace them, we plan to get black stainless appliances.
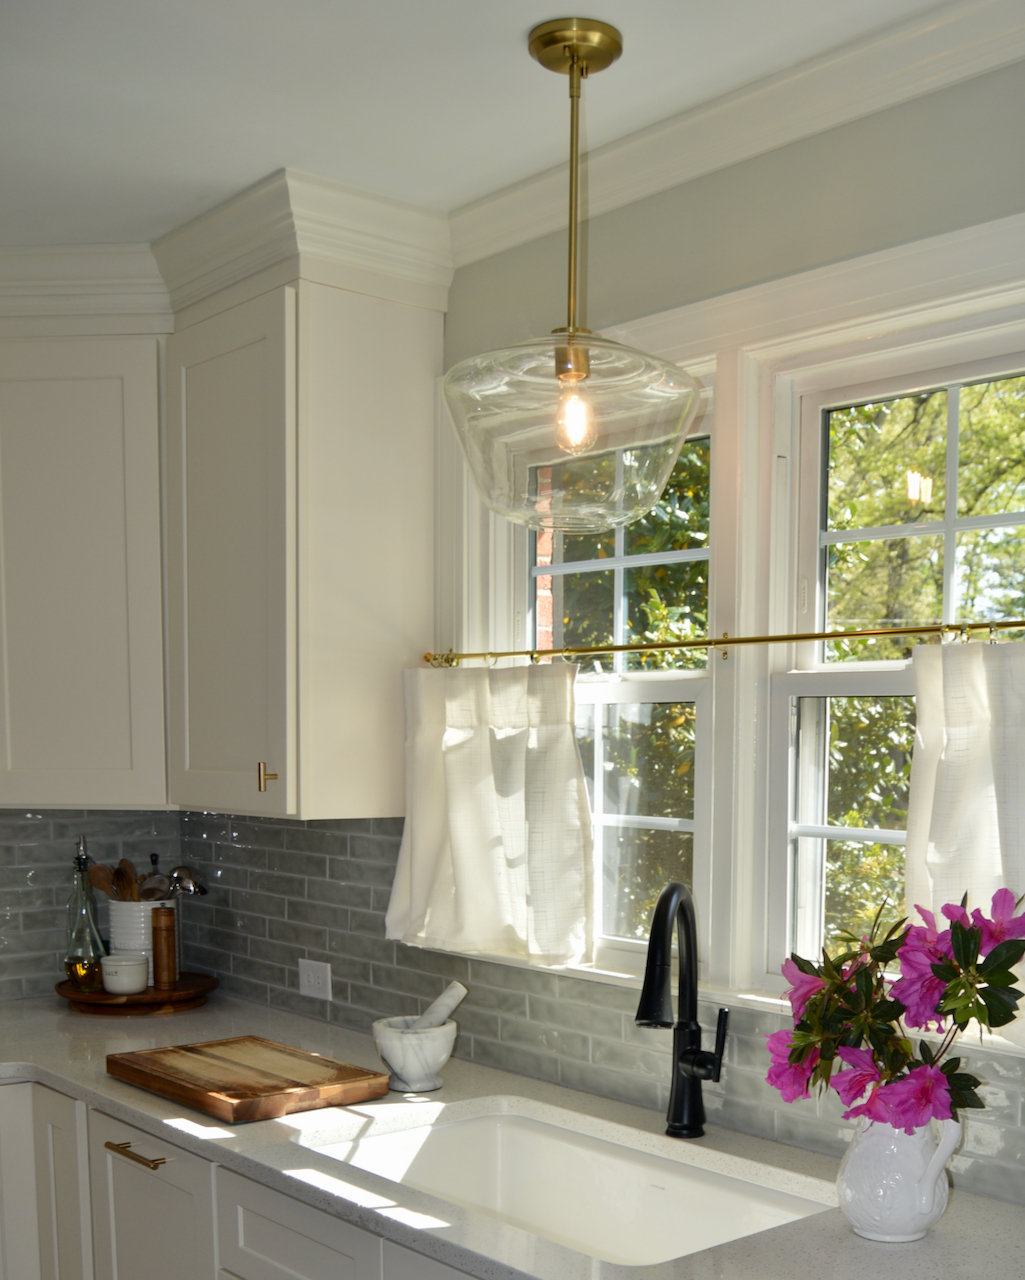
We used this Kohler under mount single basin sink – we debated the farmhouse sink but decided against it to keep things more sleek and I’m really happy with our decision. I am so impressed with Kohler as I looked at many sink suppliers and they are the best for quality, aesthetics and price!
The window treatments really tie the space together, I love this Roman Shade from Pottery Barn for our almost floor to ceiling window. I had a difficult time finding cafe curtains for the sink window that were the right size so I decided to make my own. I used this tension rod that matched our hardware and these cafe curtain clips to hang them, both at a great price.
This Ruggable runner rug is a Morris & Co. print, which I love! It adds a airy, traditional pop of color and washes clean just as Ruggable claims – I know it will be a durable rug that we can keep clean.
8. Laundry and Pantry Closets
We had the new laundry closet built to fit the stackable washer/dryer unit with enough space for a shelf to hold the detergent and slide some collapsable laundry baskets on top. It is a tight fit but more aesthetic and functional than the previous laundry closet. We do love the washtower – since it is all one piece it doesn’t shake as much. Our contractor was able to help us get custom accordion doors for both closets that match the Shaker style of the cabinet. We painted them to match the walls.
Our Thrifty Kitchen Renovation: what we’ve learned
- Saving money on home improvements is possible but it requires you to put in some labor yourself. Fortunately when we did the reno, we had the time spare and some helpers (thanks to my in-laws!).
- We learned new skills: laying LVP, putting up backsplash, space planning/design. I hope we can apply these skills to other projects one day.
- I have more appreciation for my home. We did not go the with fastest route for this project and as a result, I feel invested in this space. I feel much more committed to keep our home well-maintained because of the work we personally put into it.
- Living in the home prior to renovations helped us make the best decisions for the space, though not convenient.
- Cream colored cabinets are amazing, except when it comes to coordinating wall color or trim colors. Thankfully we figured it out, but that was the most difficult design decision in the moment.
Other Posts for a Flourishing Home:
Let me know what questions you have in the comments below!

