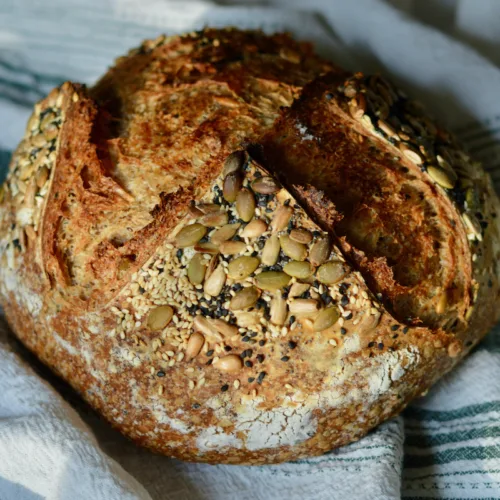
Seeded Sourdough Bread
Discover how to make a nutritious and artisan-style Seeded Sourdough Bread at home. This recipe guides you through creating a flavorful loaf with a beautiful seeded crust and classic sourdough texture. Elevate your daily bread with this healthy and impressive homemade sourdough.
Print Recipe
Equipment
- 1 digtial kitchen scale
- 1 large bread bowl
- 1 large dutch oven at least 6 quarts
- 1 lame or sharp, thin kitchen knife
- parchment paper
- 2 proofing baskets alternately you can use a colander lined with a floured tea towel
Ingredients
- 75 g active and bubbly sourdough starter
- 30 g raw honey
- 555 g room temperature water
- 300 g whole wheat flour
- 570 g bread flour
- 1 cup rolled oats
- 1 cup warm water hottest tap water or water that has been heated but not boiled
- 18 g salt sea salt or pink himalayan
- 1/2 cup ground flax seed
Seed Mix-Ins (can use sub/swap as desired but this is what I use). Additional amounts as desired for topping.
- 1/4 cup raw sunflower seeds
- 1/4 cup pepitas
- 2 tbsp sesame seeds
- 2 tbsp black sesame seeds
- 1 tbsp poppy seeds
Instructions
- Whisk together room temperature water, honey and sourdough starter in a large mixing bowl until well combined.
- Add whole wheat and bread flour to water mixture and stir until flour is mostly absorbed and dough resembles a shaggy mixture.
- Cover with a plate or damp towel and set aside for 30 minutes to 1 hour to autolyse.
- Soak oats in warm water in a separate bowl and set aside for at least 10 minutes.
- Add in oat mixture (with any remaining water that wasn't absorbed by the oats), ground flaxseed, salt and seed mixture.
- With a hand that is damp (run hand under water and don't dry hand), pinch in the add-ins to the dough. Then fold/knead the dough to continue to work in the add-ins. This part is difficult and may not appear evenly dispersed but don't worry, it will continue to disperse through the remaining stretch and folds.
- Cover and set aside for 30 minutes.
- Using a damp hand, complete 4 sets of stretch and folds 30 minutes apart. How to stretch and fold: grab one corner of the dough and pull it up as far as the dough will allow without ripping then fold the stretched dough on top of the remaining dough. Continue this process all the way around the bowl. You will notice that the dough will get stretchier/softer with each set of stretch and folds. Cover and set aside until next stretch and fold.
- After final stretch and fold, flip the dough to be "fold side" down in the bowl. The top will be smooth. Cover with a plate and/or damp towel to set in a warm place for bulk fermentation.
- Bulk fermentation: Ideal temperature room temperature should be around 70-72 degrees. This process typically takes 5-10 hours, though temperature dependent. The dough will be doubled in size and when it is complete.
- Turn dough out on to work surface. If fermented appropriately, the surface will not need to be floured. Divide dough in half with a bench scraper and roughly shape the dough into 2 spheres and allow to rest on the work surface for 20 minutes.
- Complete the final shaping for both loaves. Here at 2 methods to complete the desired shape:
- For a batard (oval loaf): Turn dough over to have "skin side" down. Gently stretch out dough (do not pull to the point of ripping) to resemble a rectangle. Fold in 1/3 of the dough on the right then 1/3 of the dough from the left along the long edge. From the narrow end of your narrower folded rectangle roll up the dough - slightly pull down on the dough prior to rolling to increase surface tension as you go. Pinch in the sides as well. Once it is all rolled up pinch in the final seam. Drag the dough against the longer end to continue adding surface tension, but don't pull past to the point of ripping the "skin" of the dough.
- For a boule (round loaf): Turn dough over to have "skin side" down. Gently stretch out dough (do not pull to point of ripping) to resemble a circle. Slightly stretch and fold in the edges until it resembles a rough sphere then flip over to "skin side" up. With two hands push and pull the sphere against the counter to create surface tension and mold into a more symmetric sphere.
- At this point you have 2 options: You can dip the "skin side" of the loaf in the remaining seed mixture then place skin/seed side down in the bottom of a floured proofing basket. Or you can skip this step and apply seeds to the top prior to baking. Remember to have the "skin side" down in the proofing basket and have the seam facing up.
- Cover each proof basket with either a damp towel or place inside a plastic grocery sack loosely tied and move to refrigerator for cold ferment. You can leave in fridge for 4 to 48 hours. I have done up to 72 hours of cold ferment with satisfactory results.
- When ready to bake: Preheat oven with dutch oven on the middle rack to 450F for at least 30 minutes.
- Turn dough out of proofing basket with seam side down onto parchment paper.
- If you need to top with seed mixture, I like to use a damp hand or pastry brush with water to lightly dampen the top of the loaf prior to sprinkling and "patting in" the seed mixture. This helps the seeds adhere better to the loaf.
- Using a lame or sharp, thin knife, score the loaf as desired.
- Then pick up loaf by grabbing sides of the parchment paper and transfer to dutch oven, 1 loaf per dutch oven. If you oven fits 2 dutch ovens per middle rack you can cook both loaves at the same time or just 1 at a time. Cover with lid and bake in the oven covered for 25 minutes.
- Remove lid of dutch oven and continue baking for 10-15 minutes uncovered or until you achieved the desired crust.
- Remove loaves from dutch ovens by grabbing at parchment paper corners or using oven mitts to grab loaves and place on cooling racks.
- Allow loaves to cool fully until slicing and serving. Store in an airtight bag on the counter for 3 days or in the fridge for up to 1 week. You can freeze the loaf in a freezer safe bag if desired.
Servings: 2 loaves